vDiff VMWare installation guide
Deploy the VM
- Unzip install.zip and found two files, "disk.vmdk" and "vdiff.ovf", in the "install_vmware" directory.
- We use VMWare ESXi v6.5 in this guide. You shoud be ok with version >= v4.0.
- Log into the ESXi Host Client. This is the ESXi web management UI used to manage your VMs.
- Click "Create/Register VM."
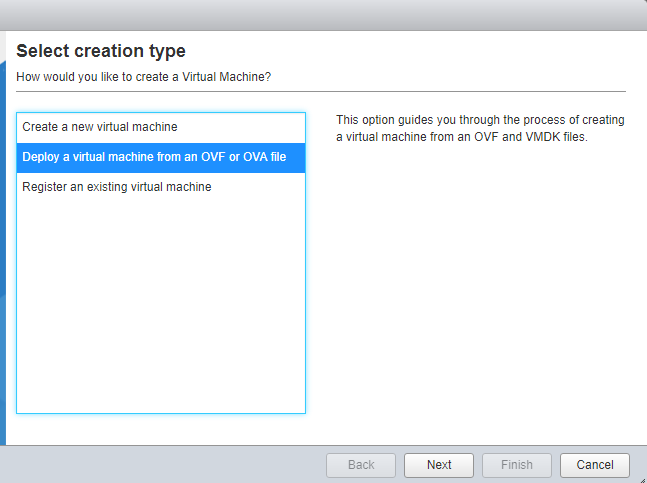
- Choose "Deploy a virtual machine from an OVF or OVA file" and click "Next."
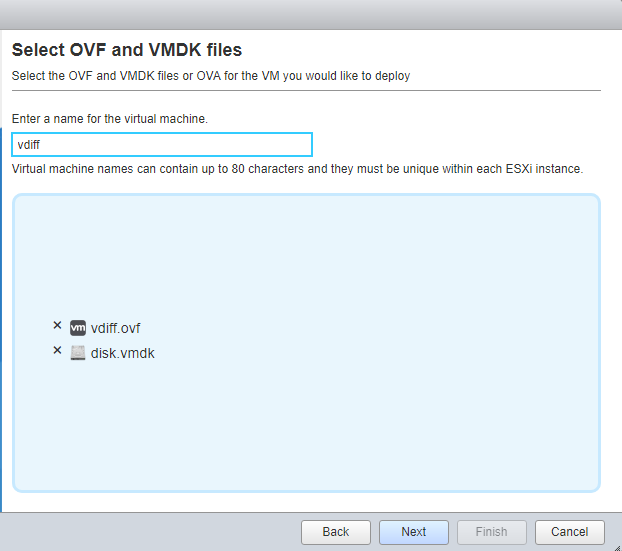
- (1) Give it a name, for example, "vdiff". (2) In the big area select or drag/drop "disk.vmdk" and "vdiff.ovf" from previous steps. (3) Click "Next."
- Select the storage to your liking and click "Next."
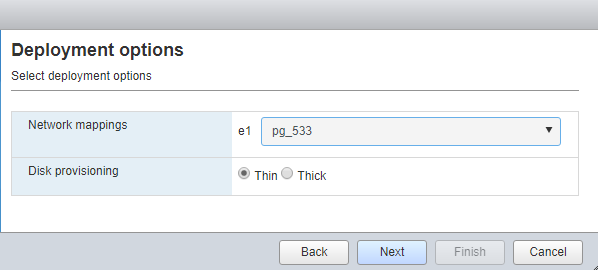
- Map "e1" to one of the port groups and select "thin" disk provisioning. Click "Next." Note that "pg_533" is the port group we use in our lab. "VM Network" is usually the one you choose.
- Review your settings and click "Finish."
- Wait till "disk.vmdk" and "vdiff.ovf" are uploaded and the new VM "vdiff" started.
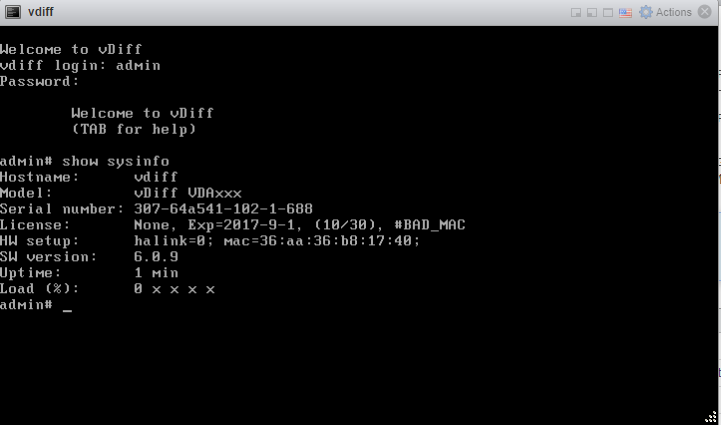
- Click open the console VGA of "vdiff" and you are ready to login. Now log in with username "admin" and password "admin".
- Run the command "show sysinfo", and you will see some basic information.
Configure networking
- In the following steps, we configure the IP address.
The IP address is mandatory becasue we access vdiff's web UI with this address.
The default IP address of vdiff is 192.168.1.99/24.
We change this to 10.53.3.99/24, which is suitable for our lab.
You should use one that suites your environment.
Consult your system administrator if you are not sure.
Usually this is a free IP in "VM Network."
Optinally, we configure the default gateway and the DNS.
This is not mandatory but having them are convenient.
The default ones are 192.168.1.1 and 192.168.1.1, respectively, and the ones for our lab are 10.53.3.254 and 10.53.1.254, respectively.
Consult your system administrator for proper ones in your environment.
- Run "get ip" to see the ip address of vdiff. The default one is 192.168.1.99/24. You change this by "set ip edit 1 ipmask 10.53.3.99/24". "get ip" again to verify that the new ip is configured.
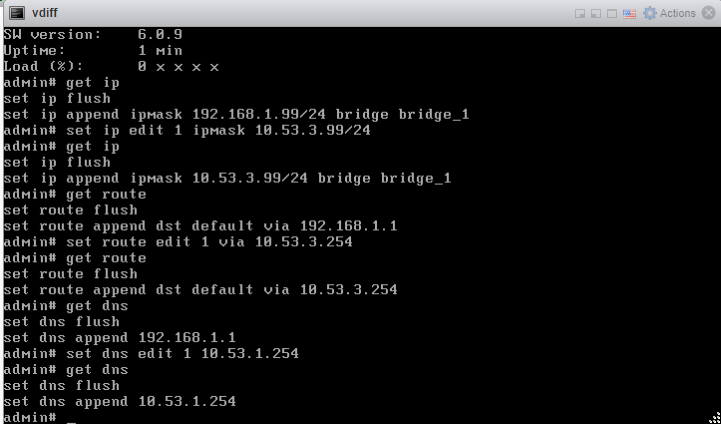
- Run "get route" to see the routing config. The default route is 192.168.1.1. Change it by "set route edit 1 via 10.53.3.254" and "get route" again to verify.
- Run "get dns" to see the DNS servers. The default one is 192.168.1.1. Change it by "set dns edit 1 10.53.1.254". and "get dns" again to verify.
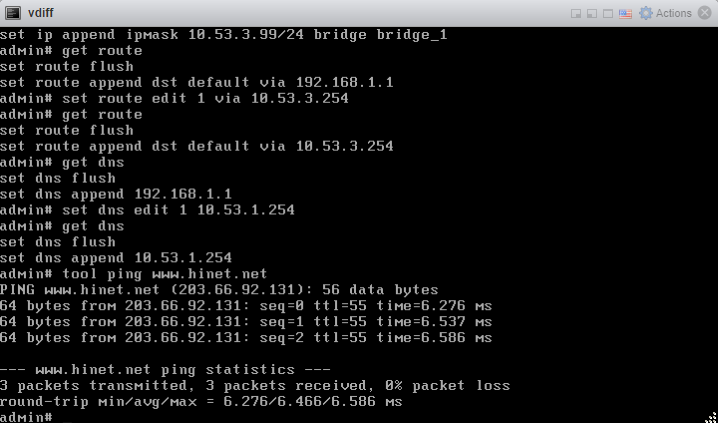
- "tool ping www.hinet.net" to check that the configurations are all right.
Use the web UI for the first time
- Open a new tab of your browser and enter "https://10.53.3.99". Replace 10.53.3.99 with the IP address assigned to your vdiff in the "set ip ..." step.
- Login with "admin" "admin".
Fix #BAD_MAC
- You see "#BAD_MAC" in the "license" line in "System information" block. This is bad and lets fix it.
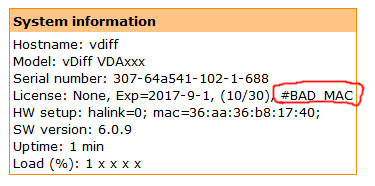
- Copy the MAC address in the "HW setup" line.
It's "36:aa:36:b8:17:40" in the example and yours is be similar but different.
- Go back to VMWare management UI and "Power off" vdiff.
It shows a warning about data corruption. Ignore it and click "Yes."
- Click "Edit" to show the settings of vdiff.
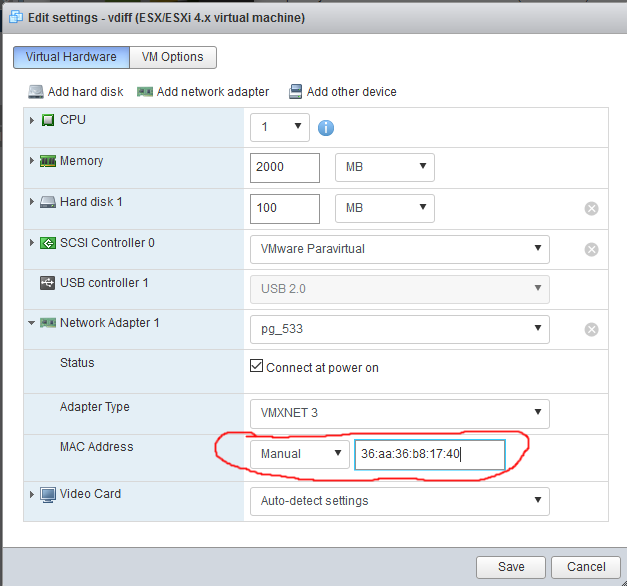
Click "Network adapter 1" to expand.
- In the "MAC address" row, change "Automatic" to "Manual" and paste the MAC address you copied prviously in the next input field.
"Save" your settings.
- "Power on" vdiff.
Verifcation
- Log into vdiff admin UI again and verify that "#BAD_MAC" is gone.
- You see "#EXPIRED" now. Please see the "license update guilde" to solve this.


